Before setting up the integration, make sure you have the following:
Before connecting Phone Validator to your workflows, you will need your API key.
- Log in to your account at phonevalidator.com.
- Click your name in the top right corner and select My Account.
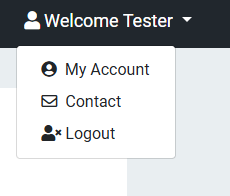
Click your name in the top right corner and select My Account.
- On the My Account page, locate the API Keys row and click Manage API Keys.
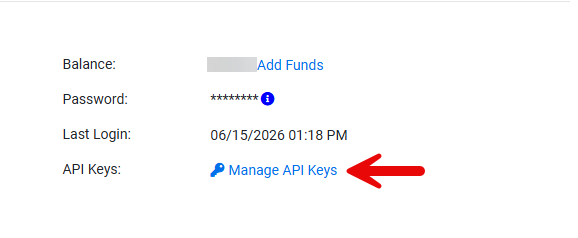
Click Manage API Keys on the My Account page.
- In the Manage API Keys window, copy the key next to your Primary entry. Keep this key safe — you will need it in the next step.
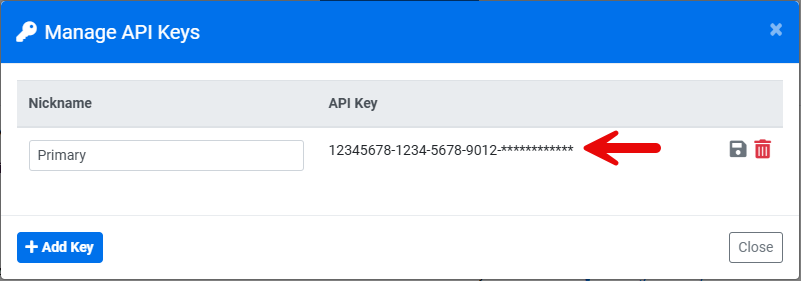
Copy the API key next to your Primary entry.
- Log in to your workflow automation platform account.
- Navigate to the App Marketplace from the main menu.
- Use the search bar to search for PhoneValidator.com.
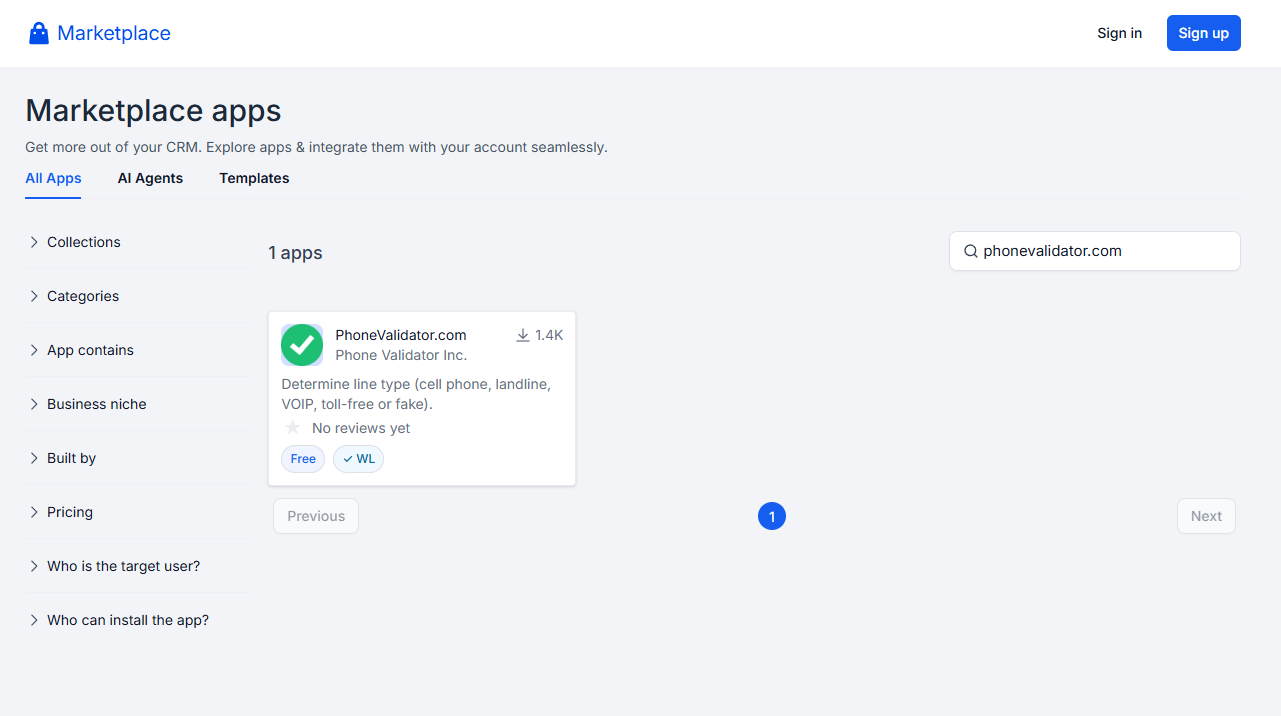
Search for PhoneValidator.com in the App Marketplace.
- Click into the listing and click Install.
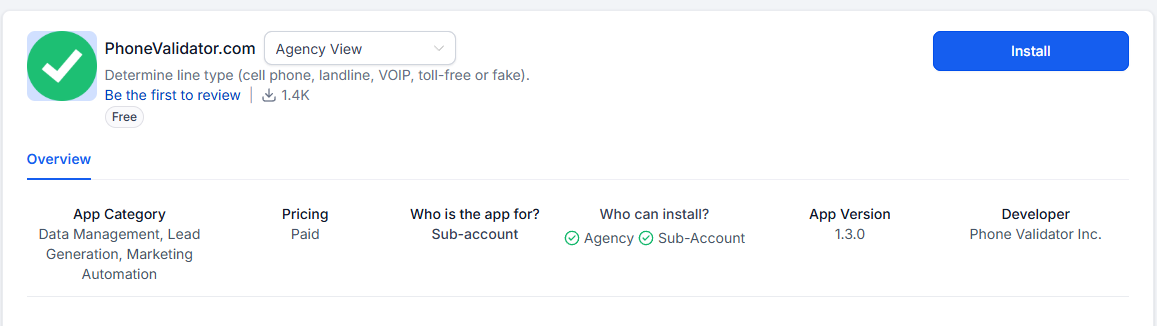
Click Install on the PhoneValidator.com listing.
- Choose whether to install for a single account or across all accounts you manage, then confirm the install.
- Open an existing workflow, or create a new one.
- Click the + button to add an action and search for PhoneValidator.com.
- Select the Validate Phone Number action.
Configure the action with the following fields:
After the action runs, the following fields are available to use in subsequent steps of your workflow — for example, to branch a condition, update a contact field, or add a tag:
| Field | Description |
|---|---|
| Phone | The phone number that was validated |
| Line Type | CELL PHONE, LANDLINE, VOIP, TOLL-FREE, UNKNOWN, or FAKE |
| Phone Company | The carrier (e.g. T-Mobile, Verizon, AT&T) |
| Phone Location | City and state/region of the number |
| Fake Number | YES or NO |
| Fake Number Reason | Reason if the number is flagged as fake |
| Error Code | Present if an error occurred validating this specific number; blank otherwise |
| Error Description | Description of the error if Error Code is present; blank otherwise |
| Cost | Cost of the search in dollars |
| Search Date | Date and time the search was performed |
| Status Code | 200 = success, all other codes indicate an error |
| Status Message | OK or error description |
This example shows how to automatically validate a phone number when a lead comes in, then route the lead based on the result — a common way to keep bad numbers out of your pipeline.
- Trigger — New form submitted (or any trigger that captures a phone number)
- Action — Validate Phone Number
- Condition — Is Fake Number = YES? If yes, add a tag (e.g. "Invalid Number") and stop the workflow. No further contact steps run.
- Condition — Line Type, for numbers that pass the fake check:
| Line Type | Tag Applied | Routing |
|---|---|---|
| CELL PHONE | Mobile – SMS Eligible | Enroll in SMS nurture campaign |
| LANDLINE | Landline – Call Only | Enroll in call queue |
| VOIP | VOIP – Manual Review | Notify sales team |
| TOLL-FREE | Toll-Free – Manual Review | Notify sales team |
| UNKNOWN | Unknown – Manual Review | Notify sales team |
- A new lead submits a form, capturing their phone number.
- The Validate Phone Number action checks the number and returns its line type, carrier, location, and fake number status.
- Numbers flagged as fake are tagged and removed from further contact automatically, regardless of line type.
- Remaining numbers are routed based on line type: cell phones go straight into an SMS nurture campaign, landlines go into a call-only queue since they can't be texted, and VOIP, toll-free, or unknown numbers are flagged for a quick manual look before anyone spends outreach effort on them.
Phone Validator uses a pay-per-search credit system. Each phone number lookup consumes one credit from your phonevalidator.com account.
To manage your credit balance, log in to phonevalidator.com, click your name in the top navigation bar, and select My Account.
Click your name in the top navigation bar and select My Account.
On the My Account page you can view your current balance and click Add Funds to purchase additional credits.
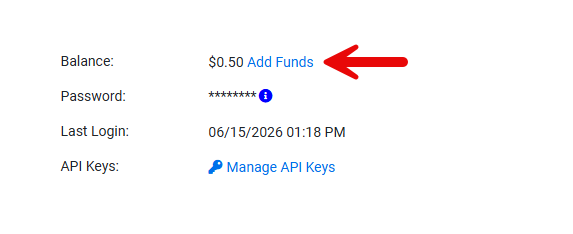
Click Add Funds to purchase additional credits.
To ensure your workflows never stop running due to insufficient credits, set up Auto Refill. This automatically adds credits to your account when your balance falls below a set threshold. Note: Auto Refill requires a credit card on file. Add your card under Credit Cards on File before enabling Auto Refill.
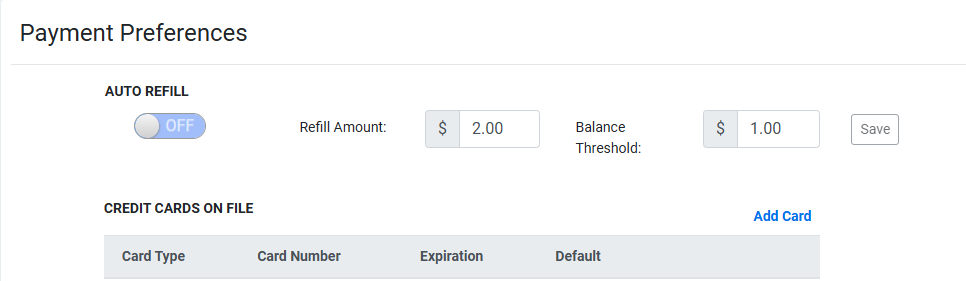
Enable Auto Refill and set your Refill Amount and Balance Threshold. A credit card on file is required.
Ready to get started? Create a free account today.
GET STARTED!