
Before installing the extension, make sure you have the following:
Before configuring the extension, you will need your API key.
- Log in to your account at phonevalidator.com.
- Click your name in the top right corner and select My Account.
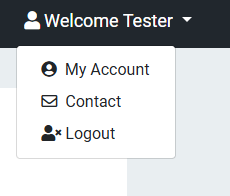
Click your name in the top right corner and select My Account.
- On the My Account page, locate the API Keys row and click Manage API Keys.
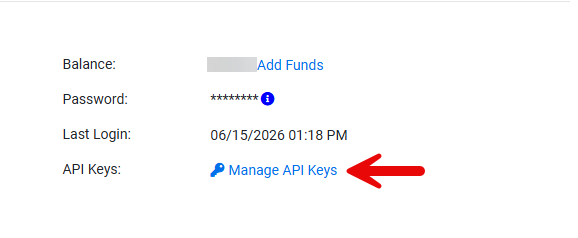
Click Manage API Keys on the My Account page.
- In the Manage API Keys window, copy the key next to your Primary entry. Keep this key safe — you will need it in the next step.
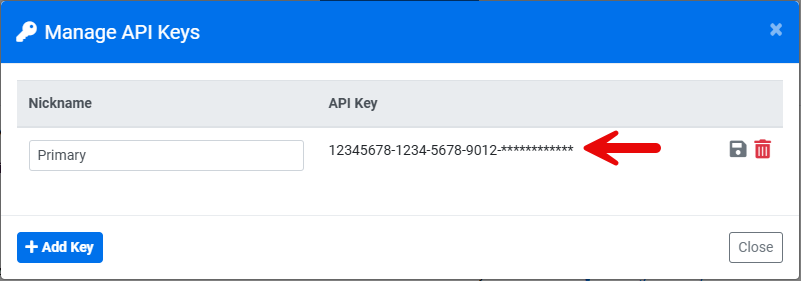
Copy the API key next to your Primary entry.
- Install Phone Validator for Zoho CRM from the Zoho Marketplace listing.
- Follow the on-screen prompts to complete installation into your CRM account.
- In Zoho CRM, go to Setup → Marketplace → All → Installed and open Phone Validator for Zoho CRM.
- Open Extension Settings.
- Enter the following:
| Setting | Description |
|---|---|
| API Key | Your Phone Validator API key from the previous step. |
| Enable Auto-Validation | Turns on automatic validation via workflow rule. Requires Enterprise edition. Leave unchecked if you only plan to use the manual button or bulk widget. |
| Region | 1 = US and outside US (recommended if you don't know where your numbers originate). 2 = US and Canada only, marks numbers outside as fake. 3 = outside US and Canada only, marks US/Canada numbers as fake. |
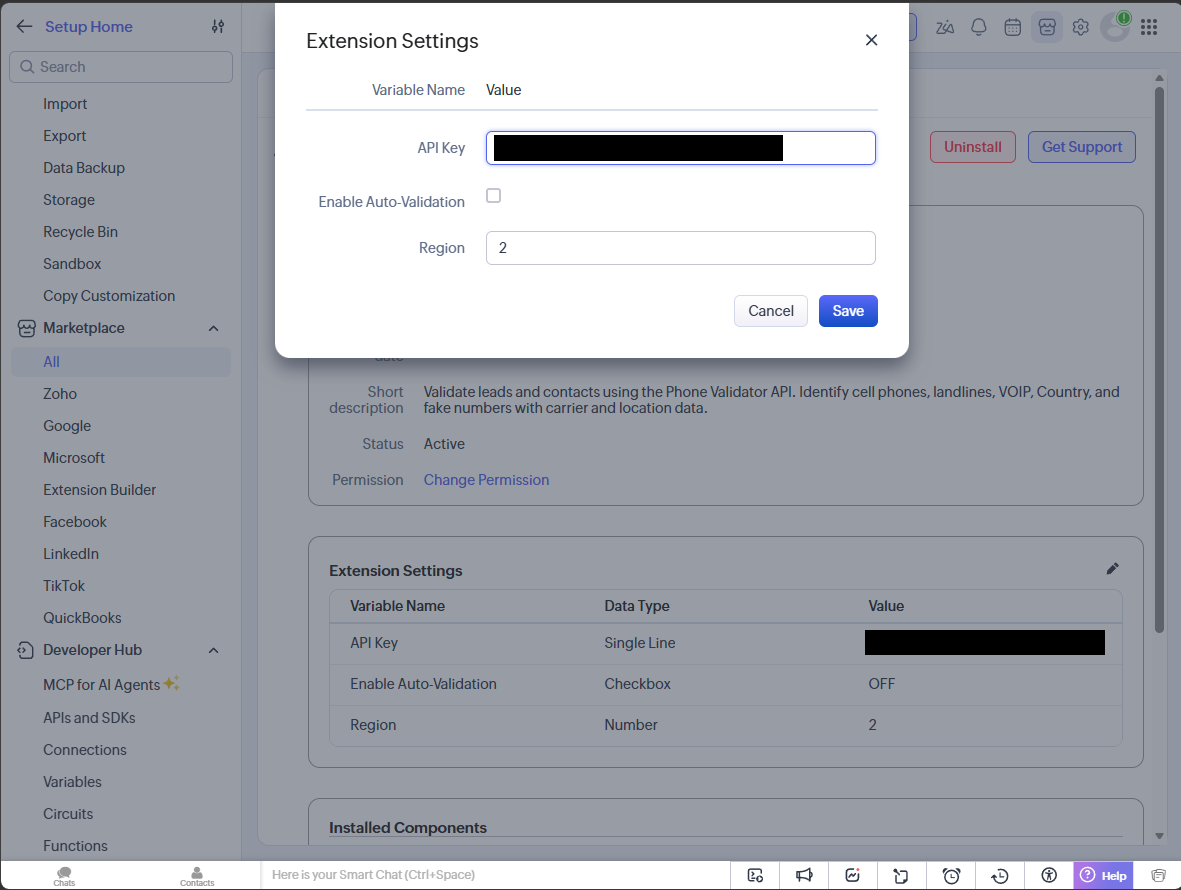
The Extension Settings dialog, where you enter your API Key and configure Enable Auto-Validation and Region.
- Click Save.
Open any Lead or Contact record and click the Validate Phone button (or Validate Mobile, depending on which field you're checking). Results populate directly into the record's Phone Validator fields.
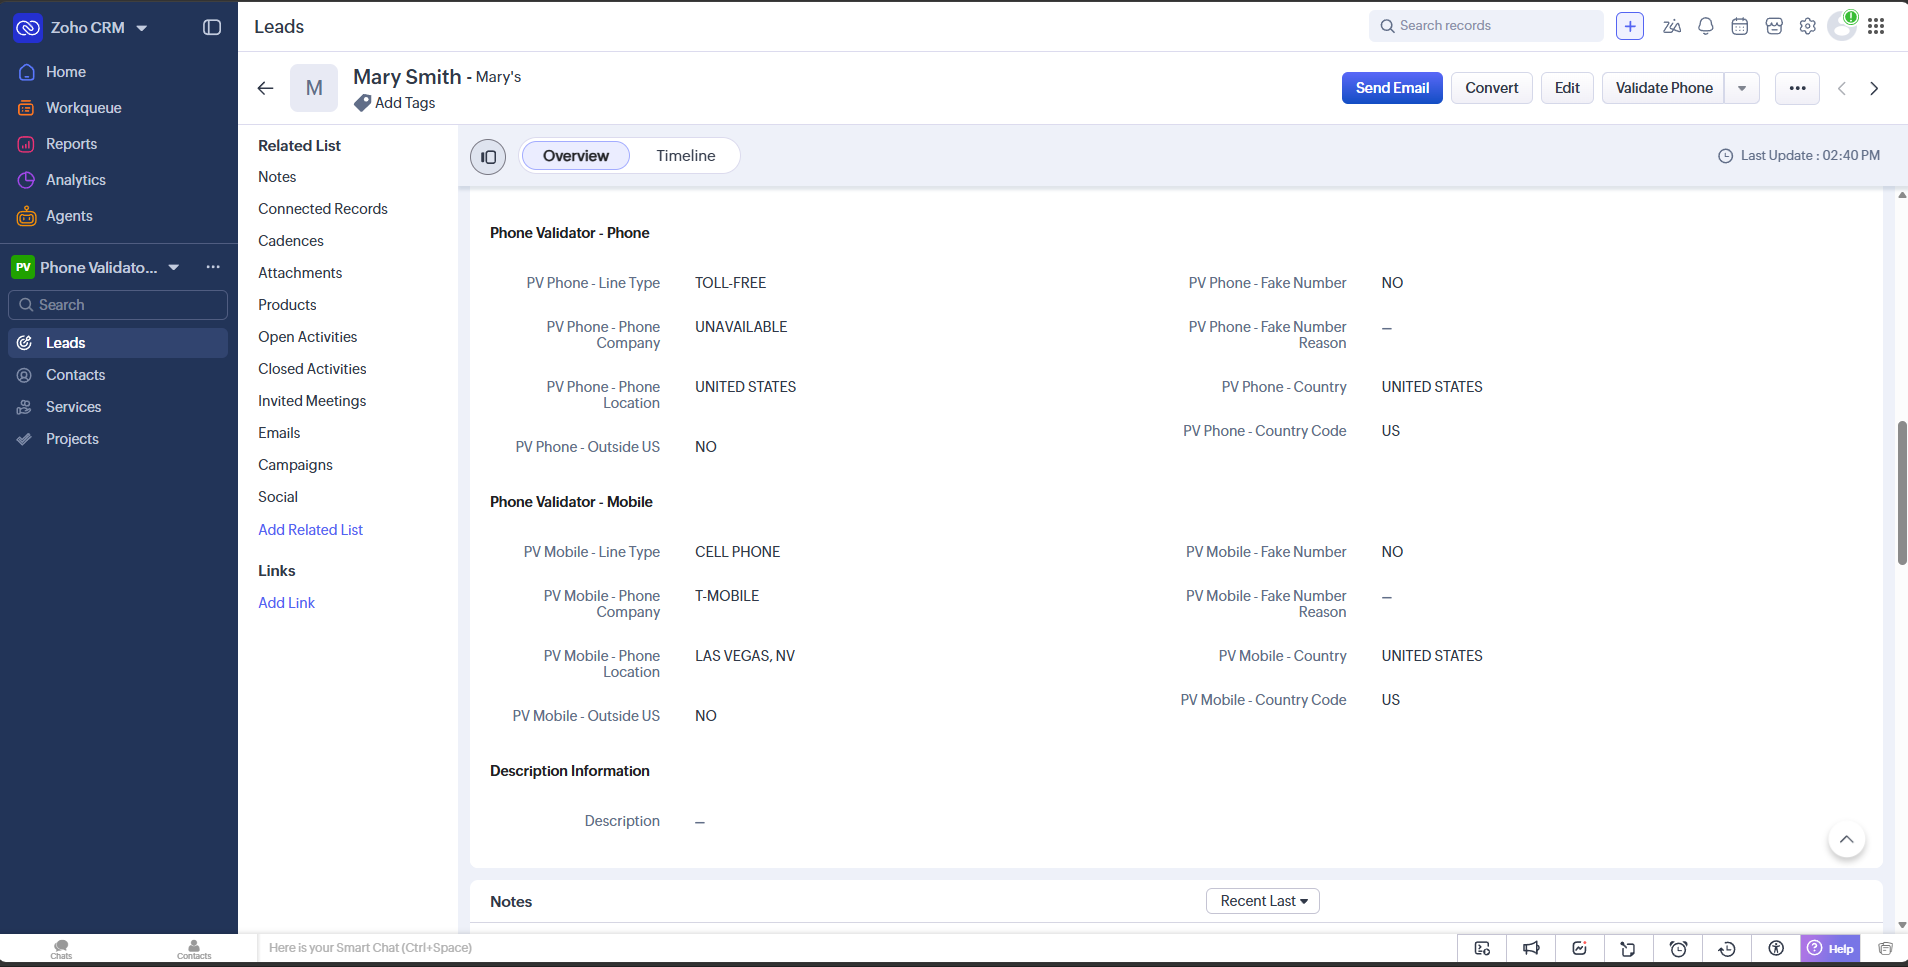
After clicking Validate Phone, the Phone Validator - Phone and Phone Validator - Mobile sections populate with line type, carrier, location, and fake number status.
Automatic validation runs Phone Validator whenever a Lead or Contact is created or updated. The workflow rule that powers this is already built into the extension, so there's nothing to configure beyond turning it on.
- Check Enable Auto-Validation in Extension Settings (previous step) and click Save.
That's it. New and updated Leads and Contacts with a Phone or Mobile number will validate automatically from that point on.
- Go to the Leads or Contacts list view.
- Click the Bulk Validate button next to Create Lead (or Create Contact) — this is separate from the Mass Action Menu.
- Choose your module, date range (or "All records"), and whether to skip already-validated records.
- Click Preview Cost to see how many lookups will run and the estimated cost, then Confirm & Queue to run the batch.
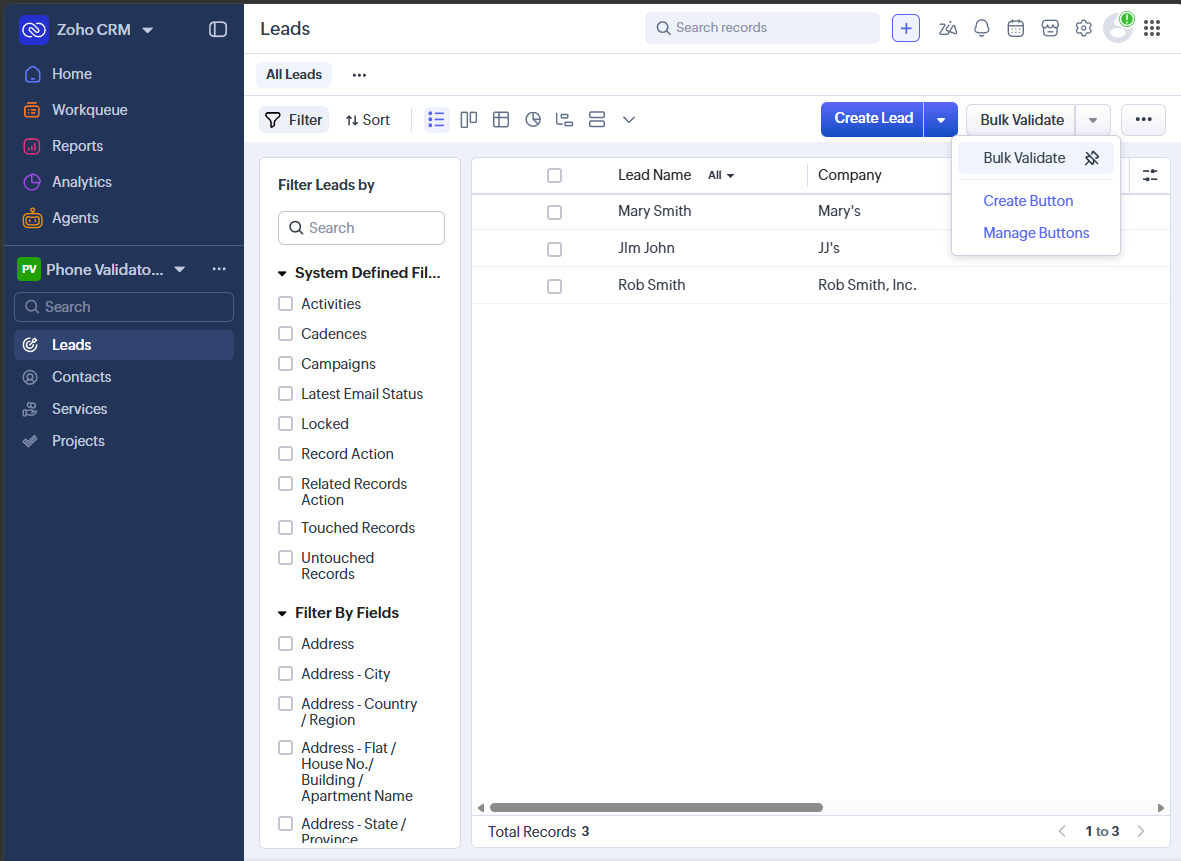
The Bulk Validate button sits next to Create Lead in the list view — separate from the Mass Action Menu.
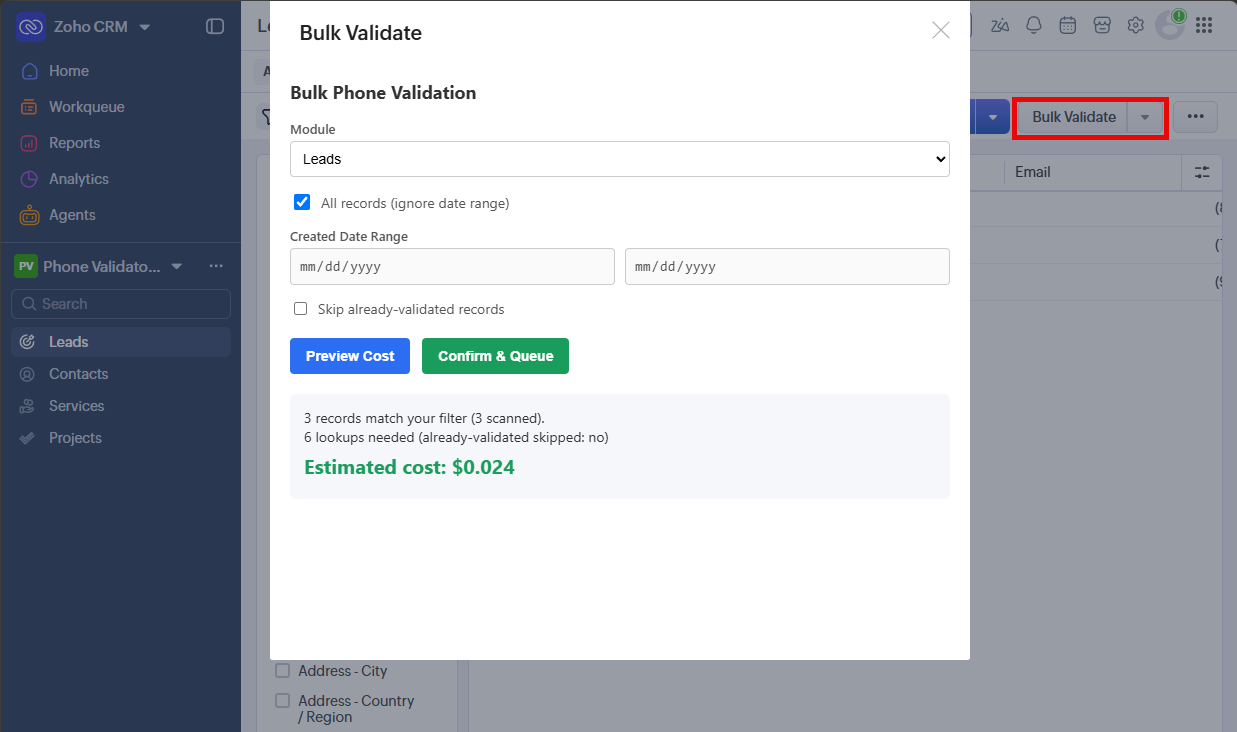
The Bulk Validate widget previews the number of lookups and estimated cost before you confirm.
Installing this extension adds 11 Phone fields and 11 Mobile fields to Leads and Contacts. To keep these from cluttering your existing layout, create a dedicated layout with two new sections and place the fields you want visible day to day.
- Go to Setup → Modules and Fields, open Leads (repeat later for Contacts).
- Clone your existing Standard layout to create a new custom layout. The Standard layout itself doesn't allow dragging fields into a new section, so a clone is required.
- In the new layout, add two sections: Phone Validator - Phone and Phone Validator - Mobile.
- Drag the standard Phone field and its related Phone Validator fields into the "Phone Validator - Phone" section — at minimum Line Type, Phone Company, Location, Outside US, Country, Country Code, Fake Number, and Fake Number Reason.
- Drag the standard Mobile field and its related Phone Validator fields into the "Phone Validator - Mobile" section, using the same set.
- Save the layout.
- Repeat for Contacts.
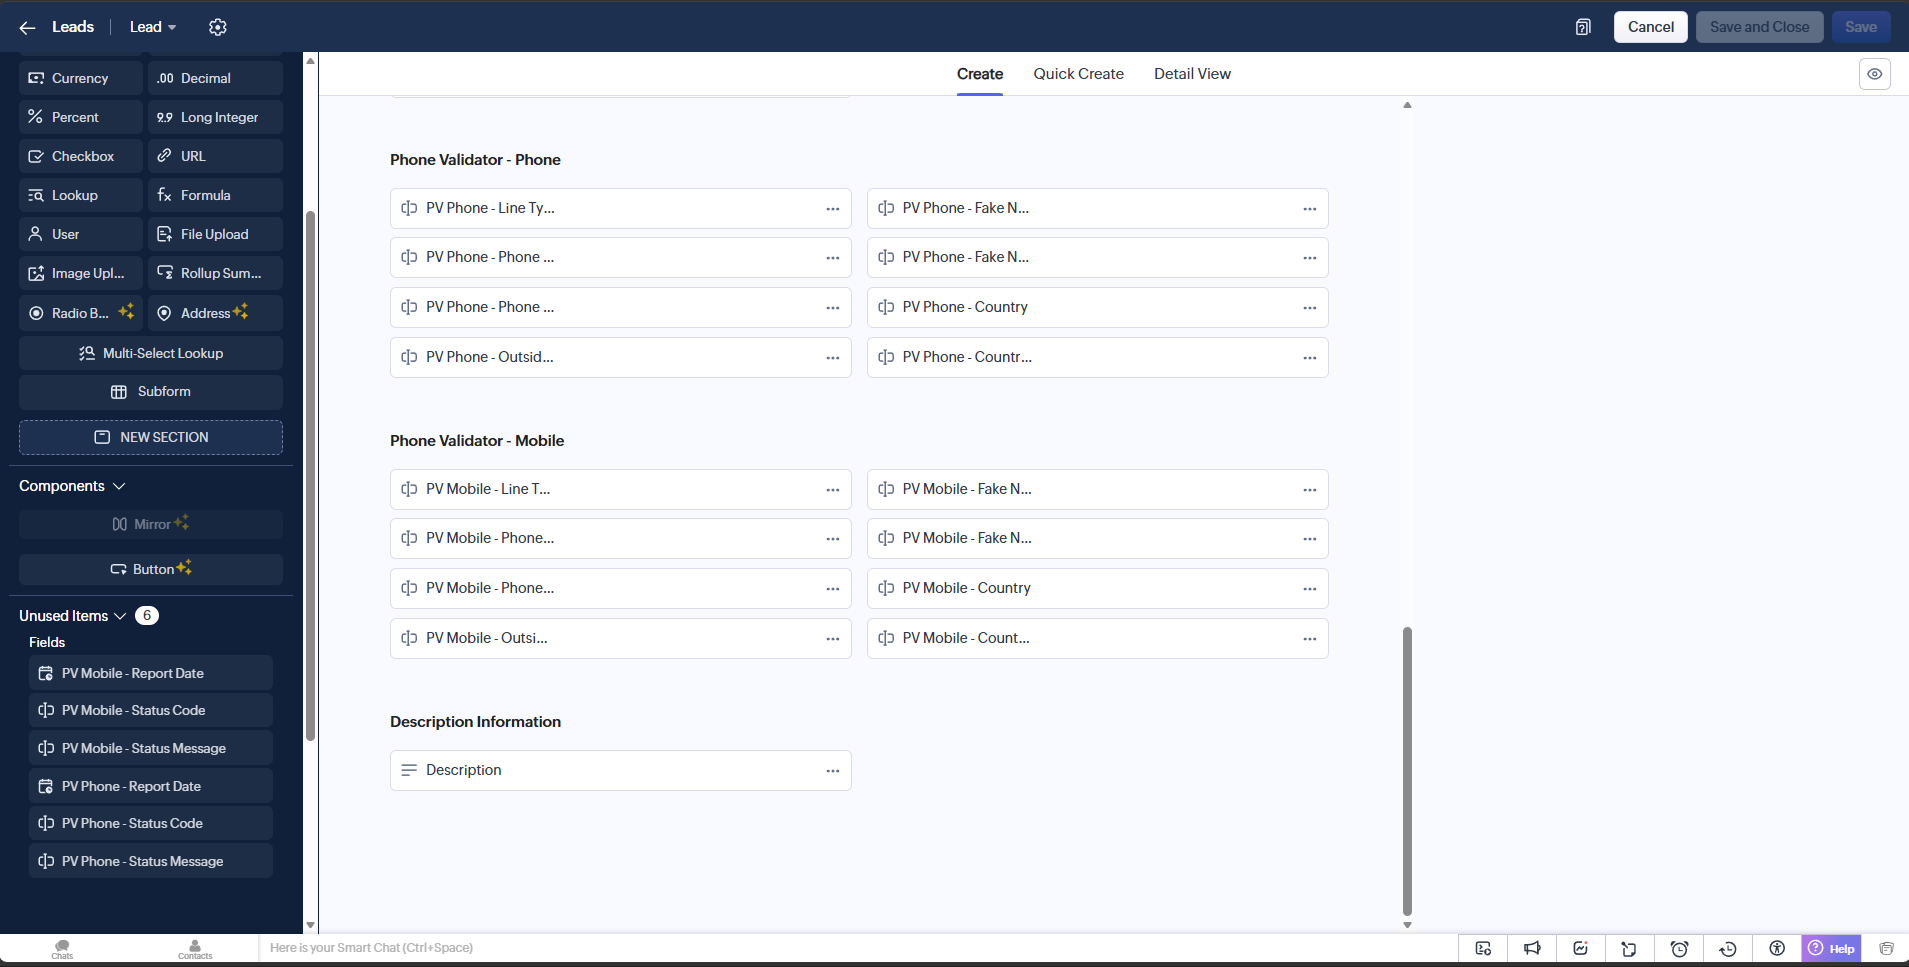
A layout with the core Phone Validator fields organized into their own sections. Report Date, Status Code, and Status Message are left in Unused Items here, but you can add them too.
Assigning the new layout to a profile only affects records created after the change. To update records that already exist, migrate them separately.
- Go to Setup → Modules and Fields → Layout and use Layout Assignment to assign your new layout to the relevant profiles.
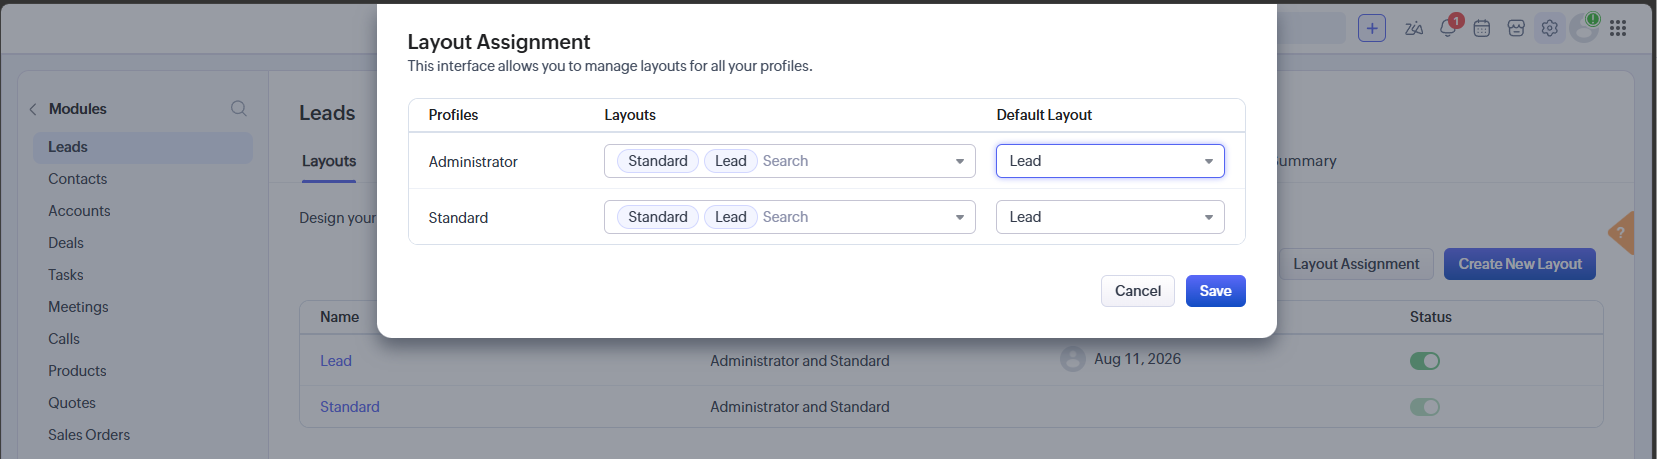
Set the Default Layout column to your custom layout for each profile that should use it.
- Go to the Leads or Contacts list view.
- Select the records you want to migrate.
- Use Mass Update and set the Layout field to your new layout.
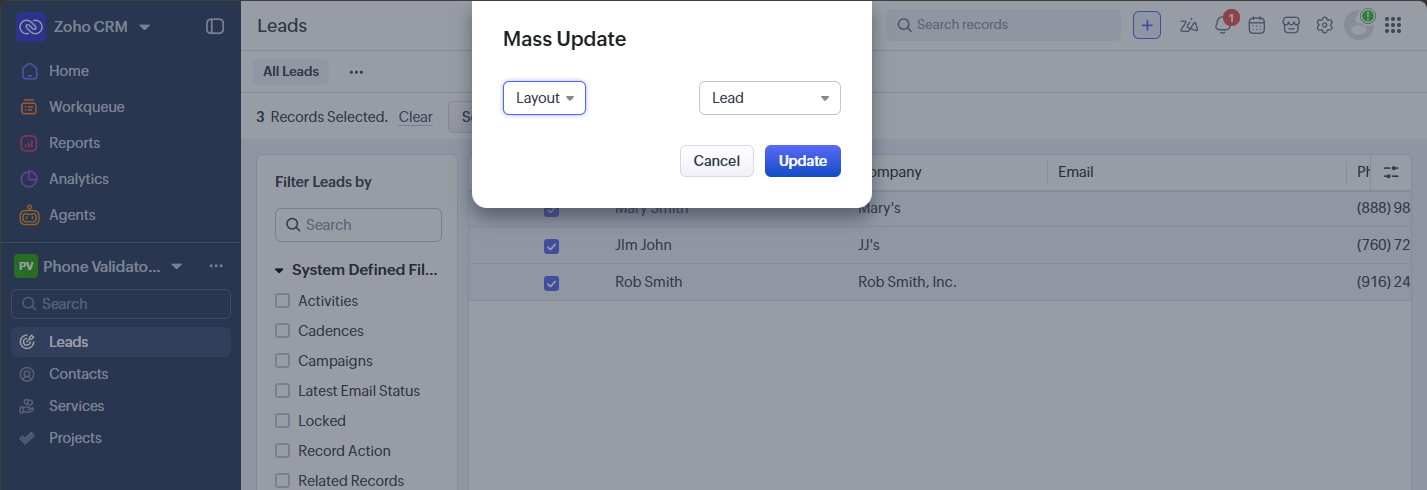
Select Layout in the Mass Update dialog and choose your custom layout to migrate the selected records.
Phone Validator uses a pay-per-search credit system. Each phone number lookup consumes one credit from your phonevalidator.com account.
To manage your credit balance, log in to phonevalidator.com, click your name in the top navigation bar, and select My Account.
Click your name in the top navigation bar and select My Account.
On the My Account page you can view your current balance and click Add Funds to purchase additional credits.
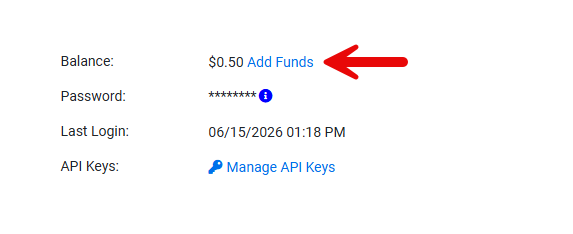
Click Add Funds to purchase additional credits.
To ensure validation never stops due to insufficient credits, set up Auto Refill. This automatically adds credits to your account when your balance falls below a set threshold. Note: Auto Refill requires a credit card on file. Add your card under Credit Cards on File before enabling Auto Refill.
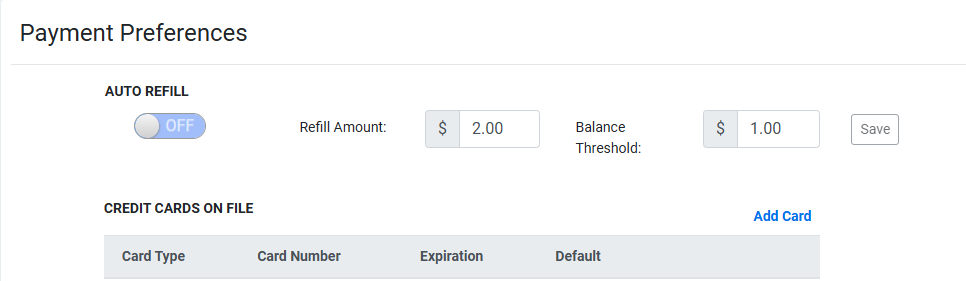
Enable Auto Refill and set your Refill Amount and Balance Threshold. A credit card on file is required.
Contact us and we'll help you get set up.
Ready to get started? Create a free account today.
GET STARTED!